


Whether stamping, highlighting or adding a comment: In the DocuWare Viewer, you can annotate a document on up to five levels and flexibly show or hide them. To learn everything you need to know about working with annotation overlays, read on...
Contents:
- What are annotation overlays?
- When is it useful to have multiple overlays?
- How can I use multiple overlays?
- On which overlay are workflow stamps placed?
- How do I know which annotation overlay is displayed and enabled for editing?
- How can I control which annotation overlays are applied when sending?
- What permissions are there for annotations and annotation overlays?
What are annotation overlays?
Annotation overlays let you add stamps, highlights, etc. to a document that is open in the viewer -without ever changing the document itself. Although the annotations appear visually on the document, they function independently from it. DocuWare provides a total of five such layers, which can be shown and hidden individually.
When is it useful to have multiple overlays?
The use of several overlays makes most sense, for example, if internal notes and customer information need to be added to a document at the same time. Different departments can make annotations on different layers. But even if a document already has multiple stamps on one layer, it can be more convenient and clear to add more annotations on a new one. When sending, downloading, and printing a document from DocuWare, you can then specifically decide whether any or which annotation overlays should be displayed/adopted.
How can I use multiple overlays?
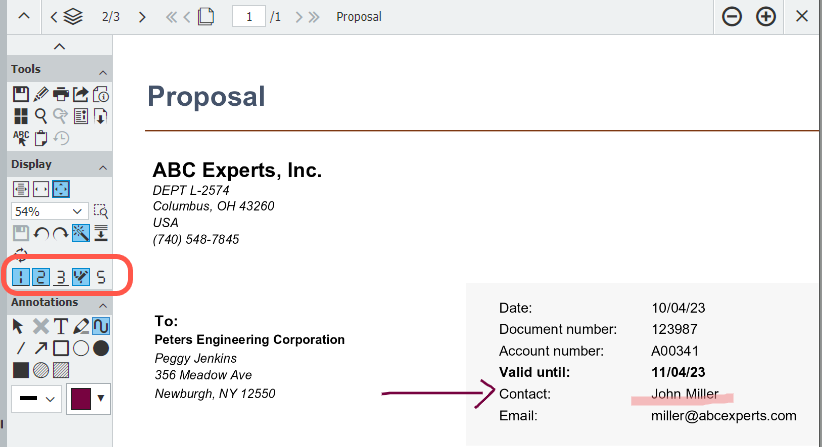
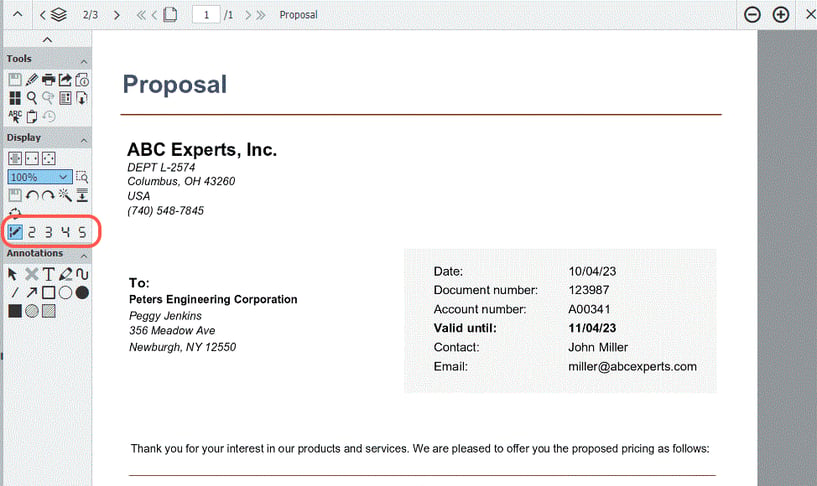
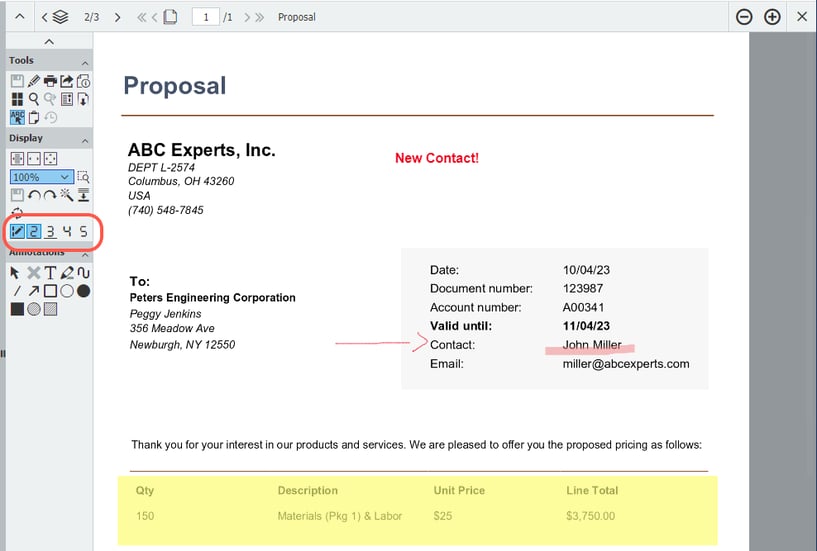
The "buttons" for showing and hiding the overlays are located in the viewer's toolbar under "Display." To show or hide an overlay, simply click on the corresponding number:
By default, the viewer toolbar only displays the button for a single annotation overlay. Additional annotation layers can be easily added by any user. To do this, open "Profile and Settings" in the DocuWare main menu and select the "Viewer" tab. In the "Display" section, you can now activate up to four additional annotation overlays by clicking on the eye icon. By the way, it is not possible to display the layers centrally via administration.
On which overlay are workflow stamps placed?
Stamps that are automatically generated when editing a document within a workflow are always placed on the first annotation overlay.
How do I know which annotation overlay is displayed and enabled for editing?
The annotation overlays that appear can be identified by the light blue background of the corresponding button. You can tell if there are already annotations on an overlay when number on a button is underlined. The edit pen next to the number indicates which layer is currently enabled for editing.
In the following example, Level 1 is the enabled editing overlay. Overlay 2 is also shown. Overlays 3, 4, and 5 are hidden. On overlay 3 there are further annotations, which are displayed by clicking the button.
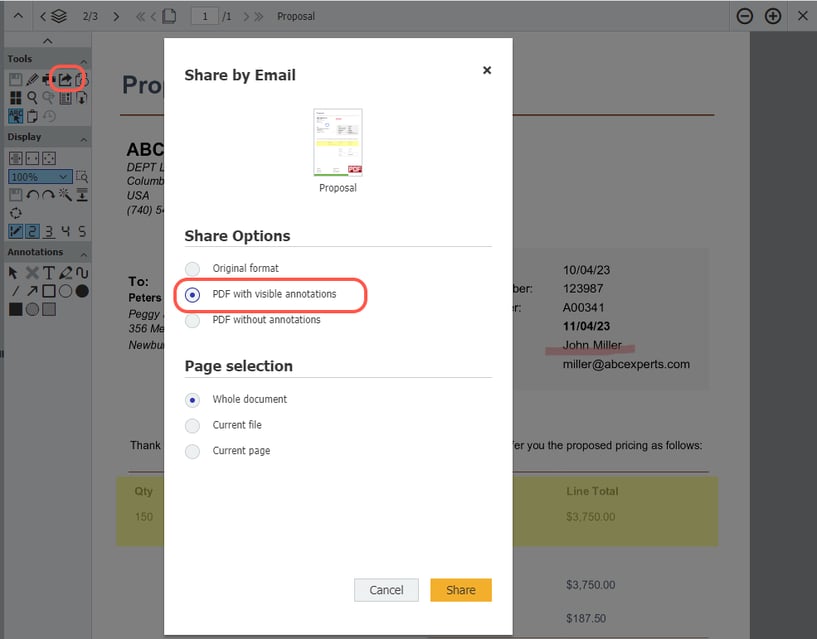
How can I control which annotation overlays are applied when sending?
When sending, printing, or downloading documents from DocuWare, you can choose to do so with or without annotations. If you want to control which annotation levels are applied, call up the "Send" function from the toolbar in the viewer and only select the "PDF with visible annotations" option.
On the other hand, the context menu of the result list, tray, folder or list gives you the option to send "As PDF with all notes."
What permissions are there for annotations and annotation overlays?
There are different rights to annotations – inserting, deleting, and modifying – as well as options for hiding stamps and graphic elements. All these rights are file cabinets permissions. For example, it is possible that you can comment on documents in an invoice file cabinet, but not in the contract file cabinet. All annotation functions are always available for documents in the mailbox.
The rights assigned always refers to all five annotation overlay levels. So it is not possible to give user A rights only for annotation level 1, user B only for level 2, etc.